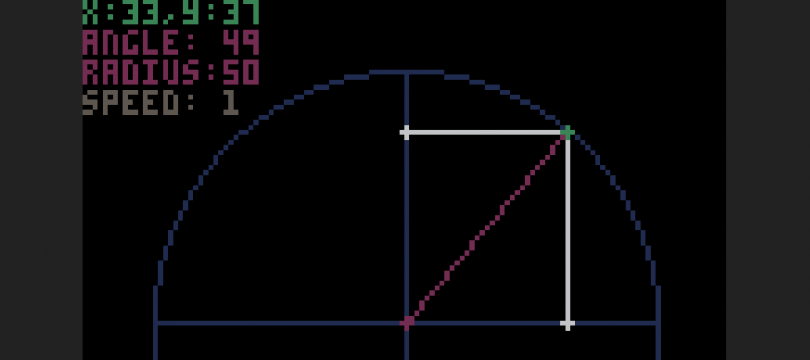
Click on the image below to start the program and see the excitement of trigonometry in action! Plotting circles in PICO-8.
Introduction
Recently I have been playing around with PICO-8. It’s a “fantasy console” that hearkens back to the NES days and includes a fully integrated development environment. This makes it a really convenient tool for learning game development or even just some graphics programming.
For this example, I wanted to learn how to program an object that orbits some origin point. In the context of game development, maybe it could be a shield or some kind of particle effect that orbits around the player’s position.
To do this, I had to learn about plotting circles in PICO-8. To my surprise, the math required is fairly minimal!
The math
You need the X and Y co-ordinate of an origin point, the radius (or distance you’d like the outer point to orbit at) and the angle of the point to plot in relation to the origin.
origin_x = 64
origin_y = 64
radius   = 10
angle    = 0

x = origin_x + radius * cos(angle/360)
y = origin_y + radius * sin(angle/360)
Using the math above, the first set of X and Y values returned would be (74,24). If we were to increment the angle by 5, the next result would be (74,62) when rounded.
Throw this into a loop that increments the angle each update, then plots the new point and job done!
Example program code
The below code is all you need to create a working example in PICO-8. PICO-8 calls the _UPDATE() function 30 times a second and the _DRAW() function 15, 30 or 60 times a second.
origin_x = 64
origin_y = 64
radius   = 10
angle    = 0
inc      = 5
x,y      = 0,0

function _update()
 angle += inc

 if (angle > 360) angle -= 360 //Keeps the angle between 0 and 360

 x = origin_x + radius * cos(angle/360)
 y = origin_y + radius * sin(angle/360)
end

function _draw()
 cls() //Clear the screen
 circfill(origin_x, origin_y, 3, 7) //Draw the inner circle
 circfill(x, y, 1, 7) //Draw the orbiting circle
end
What next?
My example program that I’ve embedded at the very start of this post is just an expanded version of the above code. I added in some controls for increasing and decreasing the radius, increasing and decreasing the angle increment (speed at which it moves) and holding the X key will pause it. Then I just plotted a few extra lines to help visualise the movement of the X and Y values.
I’m hoping to use this new knowledge to build some PICO-8 games with more interesting movement paths. I’m currently working on a Space Invaders style of game as a learning project and using similar math to enable enemies to move in more interesting patterns, as oppose to just moving straight down the screen.
Starting to wish I paid more attention in high school trigonometry classes!